Friday 19 October 2012

WIP: Anise body finished

Really pleased with how the Anise is coming along.

I have finshed the body and it's starting to look like a jacket!  The sides are pinned for now as I've added a bit more to the side seams over the hips to try and get rid of the pooling at the back.  Have a feeling I should have done a swayback adjustment, but too late now!

Look at the fraying seams!  The inside looks like a plate of spaghetti!

Back view (oops - I think those darts need a bit more pressing!)


I'm really happy with the curved back seams - I basted with silk thread as instructed and it's given a great finish, so I think I'll be doing more hand basting in future.  I used to find it slow and frustrating but I've really seen on this project why it is necessary.


It has 8 bound buttonholes (one is slightly wonky and of course is not one of the mock ones that will be partly covered by a button).

I'm really pleased with the welt pockets!  One may actually be on backwards but you can only tell on the inside!

Thursday 18 October 2012

WIP: Anise fabric and buttonholes

I'm making progress!

I realised in my last post that I hadn't posted about the fabric choices for this.

I'm using a suiting (I think it's a poly but i didn't want a thick wool jacket as I still have last year's coat).  It is a mess of fraying though - just as well the seams will be covered by a lining as I don't know what seam finish would cover up the fraying!  Still a good learning for the future.

It's in my colour of the season, which is teal.  You'll be seeing a lot of sewing in this colour over the next few months as it's a definite favourite!


The lining is a grey satin.  I wish i had gone for my original choice of fuschia pink,  but i was talked out of it by hubby!  Still, the grey will look good.

Buttons are heavy silvery ones with a sort of worn finish.

Rather than lining with muslin as per the pattern, I am using sew-in interfacing.  The muslin I could get was very lightweight and floppy and I didn't think it would give enough structure to the suiting.

I also made some practice bound buttonholes - this is the first step in the pattern (rather than machine buttonholes which are done at the end).  For a first try, they don't look too bad!

Friday 12 October 2012

WIP: Anise Jacket muslin fitting

The current project I am working on is Colette's Anise jacket.  I really love this pattern - it's so Emma Pilsbury (or that could just be the model they used!).  I have a much loved and worn but now looking a bit the worse for wear 1960s style swing jacket and thought this could be a great replacement.

I'm doing the sewalong on the Colette website and also have the Anise Companion instruction book, which is a godsend!  As I would expect from Sarai, the instructions are so clear with loads of great pictures.

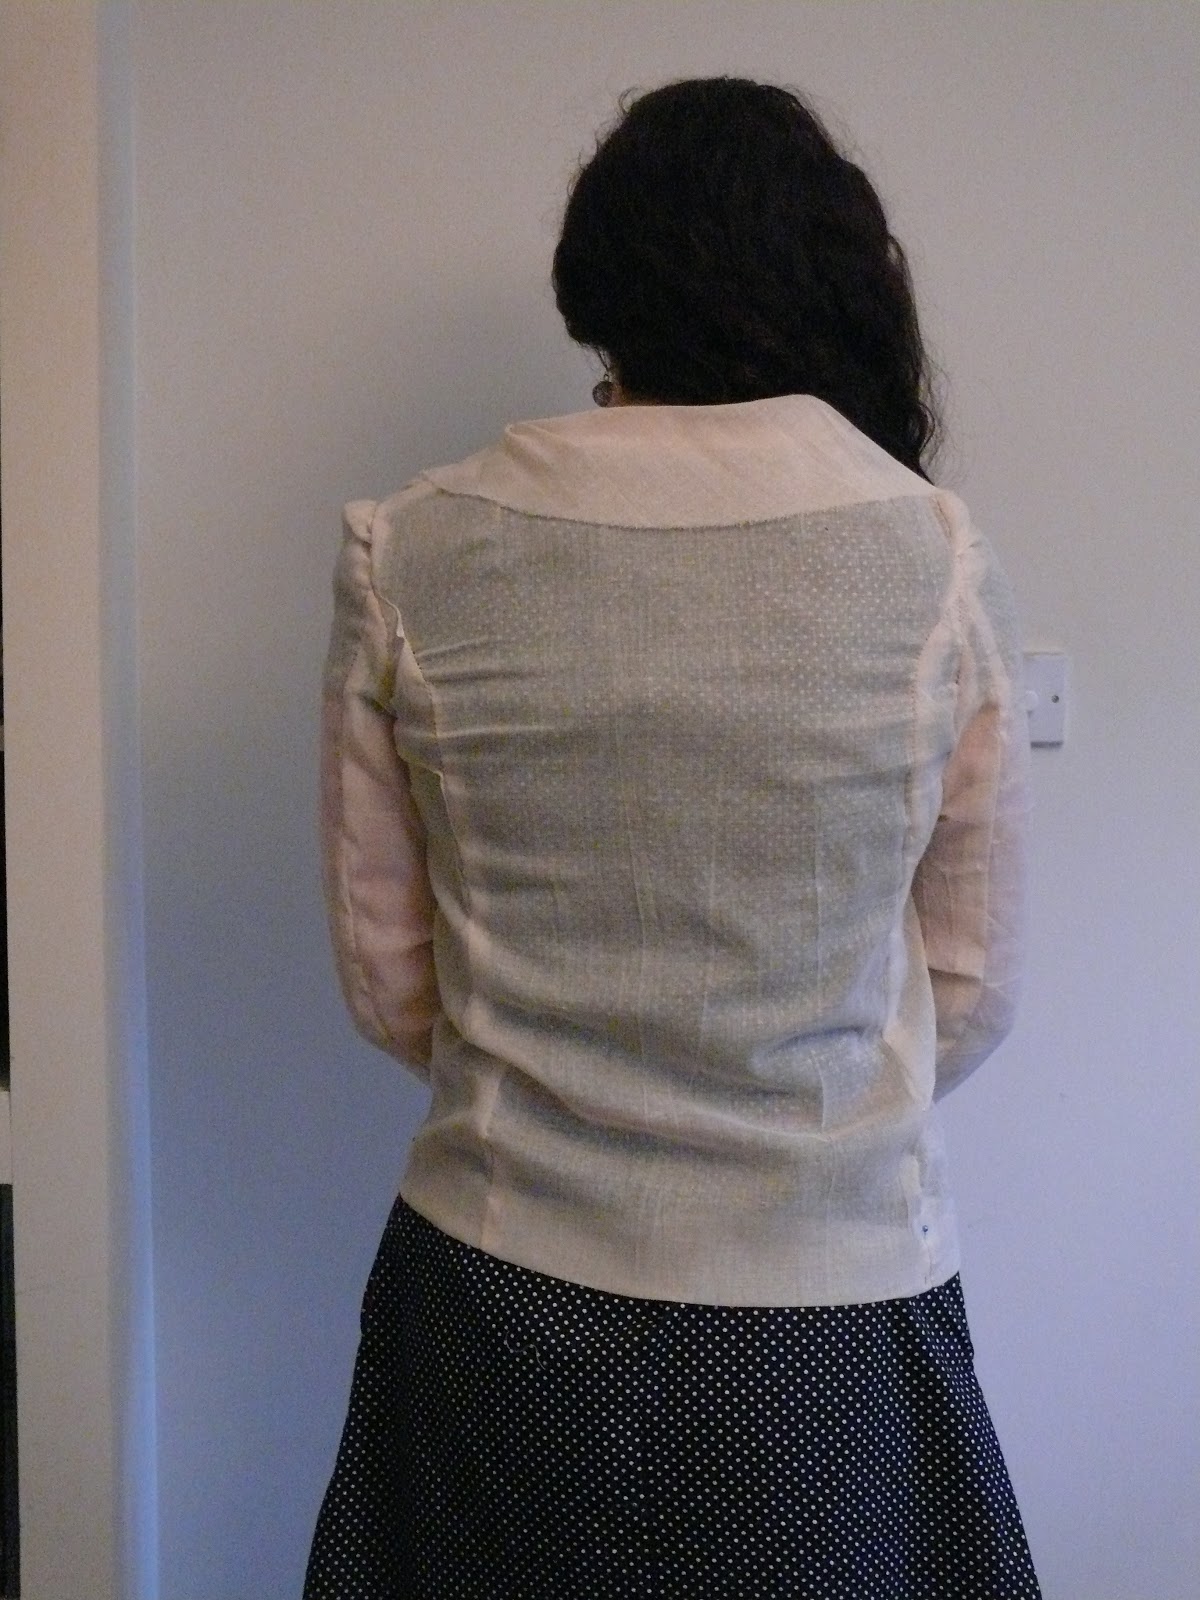
Like a good sewist, I started with a muslin.  In actual muslin for once, which proved to be a nightmare!  All that I could get was very fine stuff and I kept losing my notches in the fraying edges.  I traced a size 8 (my usual Colette size) and added 2" in length based on tissue fitting the pattern.  I think you can see from the pics below that it's quite a long way from right!


Pulling under the arms...


Sleeves too short and tight...


Too tight across the back and either needing a swayback or large bottom adjustment.  It's also a bit short still.

Pattern changes made:
extra 1" in length of bodice (is it still called a bodice on a jacket?  The body part anyway!)
wide shoulder adjustment - I guessed at adding about 3/4" to each side
Widened the upper sleeve (according to Fit for Real People you shouldn't alter the lower sleeve!)
extra 2.5" length to the sleeve

I was debating scrapping the 8 and cutting out a 10 as I was worried that it was just too small, but thought for the effort of retracing the new size, I would have another go at the 8!

I think this was the right choice as it looks much better now.
Shoulders in the right place and less stretched across the bust...
'Scuse the weird face - sleeves more comfortable
Back less pulled - that looks like a wrinkle but it's not there all the time, just in this pic!  I didn't do a swayback adjustment, but i have added an extra 1/4" to the side seams so I will pinfit the side seams and see if a bit more room in the hip area will fix it.

Due to the length adjustments, I have also repositioned the buttons and welt pocket by putting the top ones according to the pattern, and the bottom ones where they should have been in relation to the hem, and then spacing the other 2 out.

It's definitely the hardest project I have worked on (by a long way!) but I am learning loads of new things (including bound buttonholes - eek!).  I think the wide shoulder adjustment might become a regular one for me as I can see my Peony wearable muslin could benefit from it too.

Wednesday 10 October 2012

Finished: Peony Wearable Muslin

I actually finished this a couple of weeks ago but I am struggling (even more than usual) to get pictures for the blog when it's getting so dark in the evenings.  This morning I had to drag hubby out of bed early to take these pictures (that went down well!).  Such is the seasonal curse of the UK.


I really like this dress!  I love a boat neckline and the shape of the skirt works well on me.  I wish I had finished it earlier so I could wear it in the summer as it was always intended to be a summer dress, but got bumped down my sewing queue by the Macaron sewalong.    I have been wearing it with tights and boots as pictured but cotton + tights = riding up.  I may actually go back and line the skirt so I can wear it over winter.  It looks very cute with my red cardigan!


I made quite a few changes to the pattern.  As usual, I added quite a bit to the length - 2.5" to the bodice and 3" to the skirt.  I played about with the waist dart length when I lengthened the bodice but I think they have ended up about 1" too long, so I will be shortening them for the final version.  After I had so many issues with the waist fit of the Macaron, I decided to add about 1/2" to each side seam at the waist just in case.  I was glad to see that Rachel at House of Pinheiro does this too!  I didn't need as much ease as this but it was good to have it.

I added piping at the waist as I wasn't sure about the belt - i wanted something to break up the dress though.  And I do love piping!  Learning from my Macaron problems, I swapped out the invisible zip for a normal zip, as I don't think invisible ones work well with piping - to have the fabric sewn that close to the teeth of the zip combined with having to get over the extra piping fabric (even though I trimmed the cord inside short) doesn't work well!  And the piping looks fab on this dress - I managed to sew closer to the cord this time and i think the "tighter" finish looks better).


I finished all inside seams with a clean finish and bound the waist seam with red bias binding from the piping.  I did the same finish on the armscye (ooh, i just used the word armscye - I must be getting  better at this sewing lark!) as on the Macaron - I graded the seam (with the shorter side against the sleeve) and folded the longer seam allowance over the shorter and stiched.  Not sure if this is an orthodox way of finishing but it looks OK and I haven't found an easier way on such curved seams.  Anyone got any suggestions?


For the next version, I will be making a few more changes.  I will shorten the waist darts as above to stop the "nipple-y" look.  I think I need a wide shoulder adjustment.  I just discovered this while working on my Anise jacket muslin and it made a big difference to the tightness under the arms I often have.  Also by looking at it, you can see the shoulders could be wider.  I think the sleeves will be a bit looser once I sort this out.

The final version will be in a teal suiting and I am going to do the long sleeved version.  I might do the belt in a fuschia but I haven't decided yet!  Got to finish my Anise first (more on that shortly)!